Tuesday, June 12, 2018
Le protège-sangle et la sangle Seaver calculent la hauteur des sauts effectués par le cheval/poney. Le capteur n’a pas de moyen de connaître la hauteur des barres, ni celle des antérieurs du cheval. La hauteur mesurée est donc bien celle de la sangle (ou plus précisément du capteur). C’est à dire celle du milieu du sternum du cheval, au point culminant de sa trajectoire de saut.
Il est possible, si la place de départ n’est pas idéale, ou si le cheval est en cours d’apprentissage ou a été surpris/a mal estimé son saut, que le sommet de la trajectoire soit décalé, ce qui augmente généralement encore la hauteur sautée par rapport à la hauteur de l’obstacle.
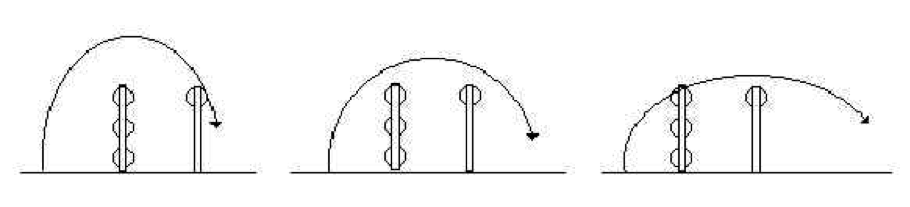
En fonction de la générosité du cheval et de son style de saut, notamment au niveau des antérieurs, le sternum passera à une distance plus ou moins grande des barres. Pour un même obstacle franchi sans faute, deux chevaux différents peuvent tout à fait sauter à des hauteurs différentes de 80cm.
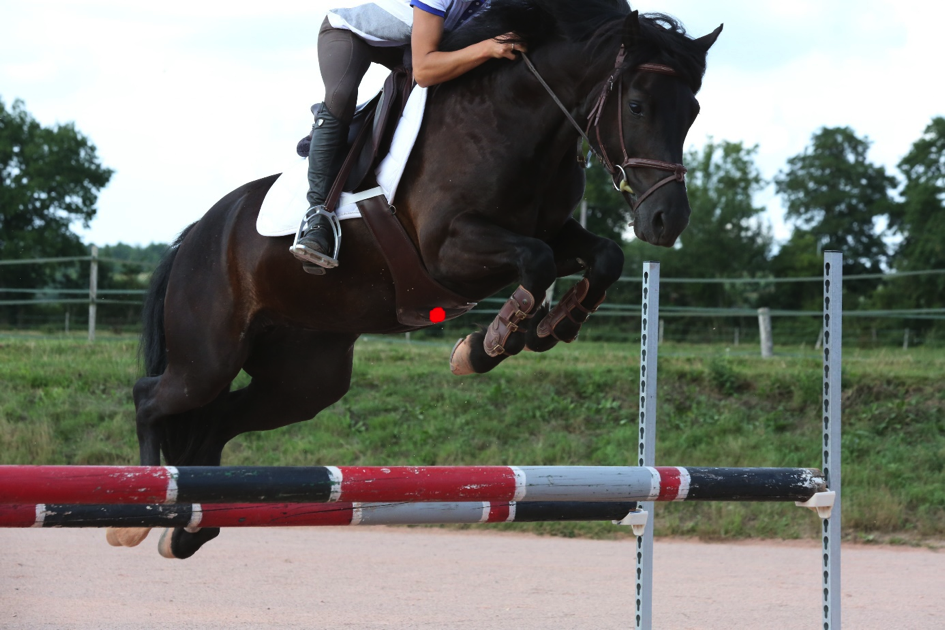
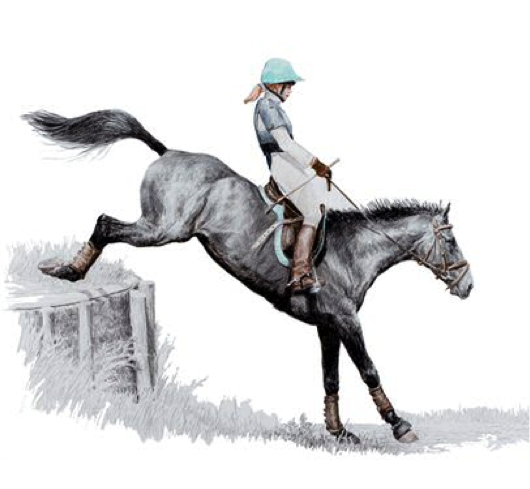
On voit ici que le capteur (point rouge) passe loin de la barre à cause de la marge du poney et de la place occupée par ses antérieurs. De plus, le poney est encore en phase ascendante, il va monter encore plus haut.
Pour un obstacle franchi sans faute, le sternum passera en moyenne 15cm (pour un cheval rasant et très rangé devant) à 75cm au-dessus de la hauteur des barres. Pour un jeune cheval surpris ou un saut en cloche, on peut atteindre des marges encore supérieures.
L’intérêt de cette mesure est de quantifier l’effort fourni par le cheval. La hauteur du saut n’est bien sûr pas la seule donnée pertinente, mais elle donne tout de même une indication sur l’énergie nécessaire au cheval pour s’élever et franchir la barre proposée, et elle permet (comme le cavalier connaît généralement au moins approximativement la hauteur de l’obstacle) de se rendre compte des tendances du cheval.
Parfois, le cavalier peut être trompé par des sensations de puissance et de vitesse et alors surestimer la hauteur de saut d’un cheval énergique avec une bonne frappe, ou au contraire sous-estimer celle d’un cheval moins tendu. Le capteur permet de quantifier objectivement cette donnée, à laquelle le cavalier n’aurait sinon accès que par analyse vidéo avec calibration préalable.
Il faut noter que les sauts inférieurs à 70cm peuvent ne pas être détectés si le cheval les « avale » dans sa foulée de galop ou s’articule et bascule peu. Au contraire, un changement de pied en l’air très expressif ou un « coup de dos » peuvent être interprétés comme des sauts. Sur des cavaletti avec un cheval qui s’articule correctement, il n’est pas rare d’obtenir des hauteurs de sauts de l’ordre de 110cm.
En effet, la sangle se situe déjà à environ 80cm du sol (variable selon les chevaux), et le cheval qui franchit un cavaletti de 30cm en montant son garrot et en s’articulant va dessiner une trajectoire de saut en élevant son sternum d’une trentaine de centimètres au-dessus du sol, ce qui donnera un saut détecté de 80 + 30 = 110cm.
Les sauts en terrains variés, notamment les sauts en descente et les obstacles type « contre-bas » ou « panoramique » avec une réception plus basse que l’appel, peuvent légèrement fausser le calcul de la hauteur de saut. Comme elle est estimée entre le point culminant de la trajectoire et la réception, elle sera bien supérieure dans ces cas-précis à la hauteur à laquelle le cheval s’est élevé à partir de son point de prise d’appel. Au contraire, les sauts en montée et « contre-hauts » peuvent être sous-estimés.
Les mesures demandées à la création d’un cheval ont une importance dans l’algorithme de détermination de la hauteur des sauts. Si elles sont mal prises, ou si vous conservez les réglages par défaut proposés dans l’application au moment de la création du profil de votre cheval, les résultats fournis par l’algorithme peuvent être faussés. En effet, nos algorithmes s’adaptent en fonction de ces mesures pour vous offrir des données précises et les plus adaptées possible à votre cheval.
Deux d’entre elles sont particulièrement importantes, il s’agit de la distance épaule-sangle et de la distance sol-sangle.
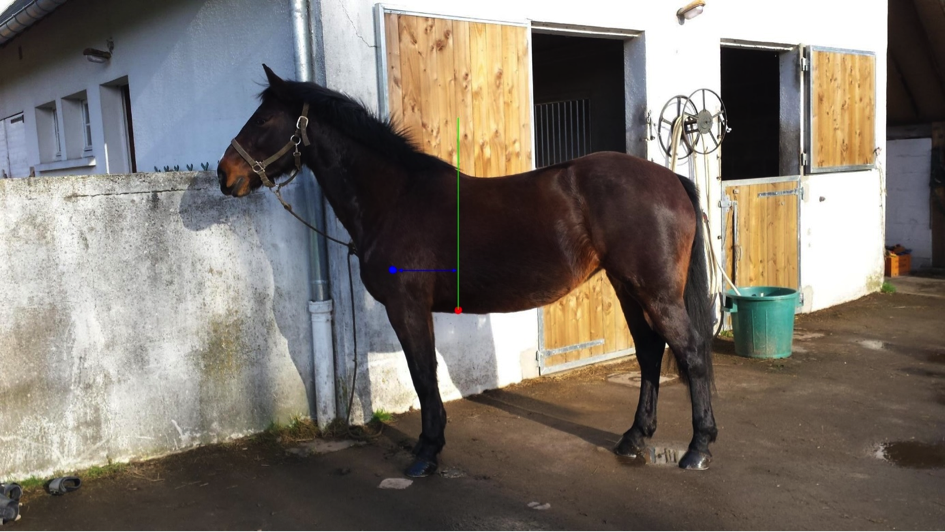
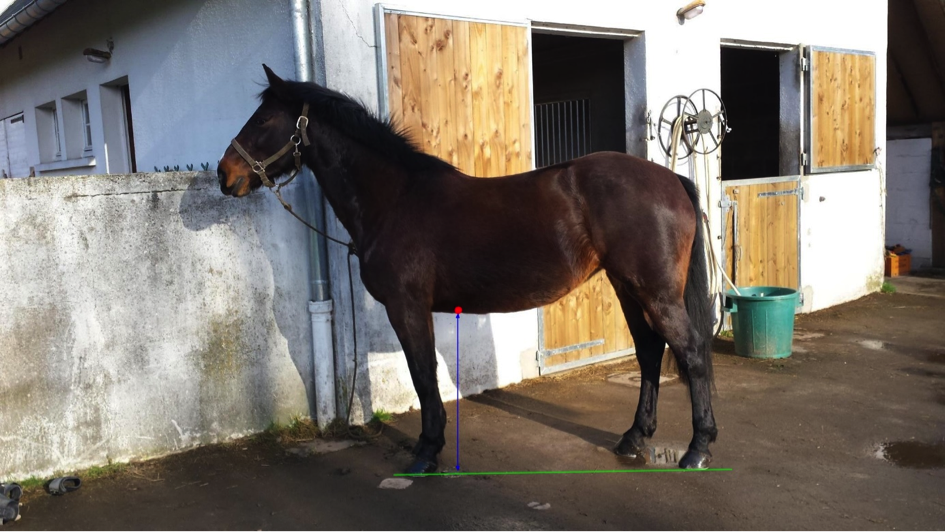
La distance sol-sangle se mesure en plaçant son cheval sur sol plat, le plus droit possible (un arrêt carré est idéal, sinon l’alignement des postérieurs peut être négligé tant que les antérieurs sont au même niveau). On mesure alors la distance verticale entre la position du capteur et le sol, à la verticale en dessous. Cette mesure se situe généralement entre 60 et 80cm pour des chevaux de taille moyenne (160cm au garrot), mais peut varier fortement selon la taille et la morphologie du cheval.
Attention, il peut être difficile de maintenir le mètre ruban vertical, il est conseillé de se faire aider par un aide extérieur qui indiquera si le ruban est incliné ou bien vertical.
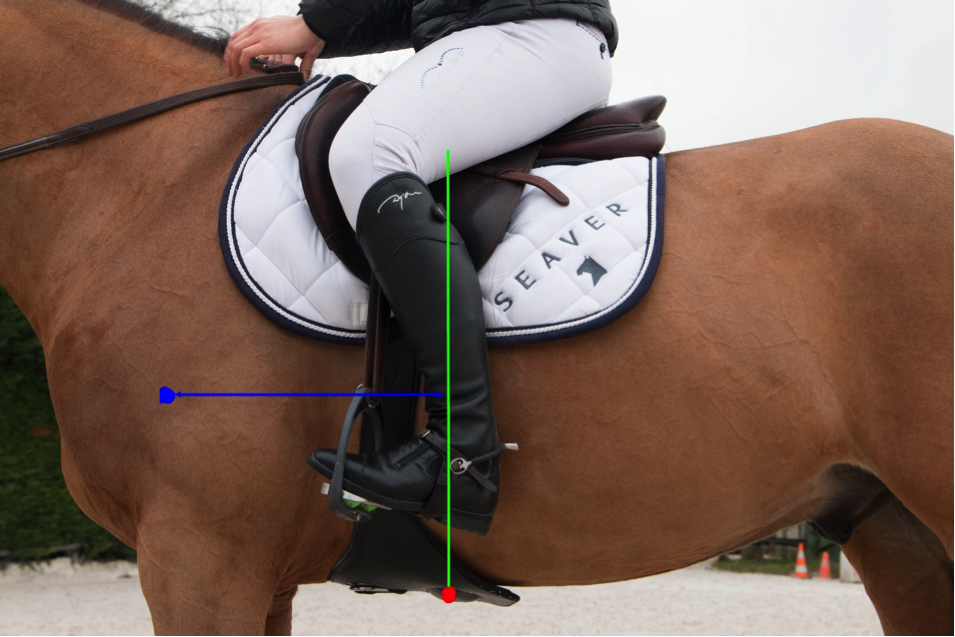
La seconde mesure importante pour cet algorithme est la distance épaule-sangle. À nouveau il faut placer le cheval arrêté et d’aplomb sur ses antérieurs, sur un sol plat. Repérez la position du milieu du capteur, et remontez à la verticale de cette position jusqu’au niveau de l’épaule. Mesurez alors la distance entre ce point et le milieu de l’épaule du cheval. Faites vous aider pour vous assurer que le ruban est bien à l’horizontale.
Cette mesure varie généralement entre 25cm et 50cm pour des chevaux de taille moyenne. Elle peut varier en fonction de la morphologie de l’équidé et du matériel utilisé (sanglage plus ou moins avancé selon le type de selle, capteur plus ou moins reculé sur la sangle selon le type de sangle).
Conseil : Prendre les mesures sur un cheval sellé permet de mieux visualiser la position du capteur